Saily eSIM Review Philippines 2026: Price, Coverage, Setup & Is It Good?
Read our Saily eSIM review for the Philippines. Compare prices, coverage, setup, compatible phones, pros and cons, and see if Saily is worth it for your trip.



Travelling to the Philippines or leaving the country as a Filipino passenger? You may need to complete an eTravel Philippines declaration before your journey.¹
eTravel is the Philippine government’s digital travel declaration system. It brings together immigration, customs and health information required for eligible arrivals and departures.
Registration is free through the official eTravel website or the eGovPH app. Avoid websites or apps that ask you to pay, as these may be scams.
Here’s who needs to register, when to do it, what information you’ll need and what happens after you submit your declaration.
We'll also introduce the Wise card, a handy travel companion to make seamless card payments when you're overseas.
| Table of Contents |
|---|


eTravel is the Philippine government’s online travel declaration system. It collects information from travellers entering or leaving the country.²
When you create a profile, you’ll enter personal and passport information. For each journey, you’ll then add details such as your flight, travel date, destination and accommodation.
The process also includes customs and health declarations used for border control and the monitoring of communicable diseases.
Most of your personal information only needs to be added when you create your profile. For future trips, you can sign in, check that your details are still correct and submit a new travel declaration.
Yes. eTravel registration is free.
Only use the official eTravel Philippines website or the eGovPH app. Be careful with unofficial websites or apps that charge a registration or processing fee.
If you have questions or think you’ve used a fraudulent website, contact the official eTravel team through the contact form on its website.
If you’re a Filipino, you’ll generally be required to complete or update your eTravel registration when you enter and leave the country.
Foreigners usually only need to complete the registration when arriving, and certain foreign diplomats and officials are exempted altogether. Here’s a summary:
| Traveller type | Arriving in the Philippines | Departing the Philippines |
|---|---|---|
| Filipino passenger or crew member | Required | Required |
| Foreign passenger or crew member | Required | Not required |
| Exempt foreign diplomats, dependants, dignitaries and delegations, 9(e) visa holders, and diplomatic or official/service passport holders | Not required | Not required |
*Details correct at the time of research - 19th August 2026
Filipino travellers generally need to submit or update their eTravel declaration before both departure and return. Foreign visitors generally complete eTravel before arriving in the Philippines but not when leaving. Certain diplomats, officials and other eligible travellers are exempt.
Complete your eTravel declaration within 72 hours, or three days—before your arrival or departure.
You may need to show proof of registration before boarding. Once you’ve submitted the declaration, download or take a screenshot of the QR code so it remains available even if you cannot access mobile data at the airport.
You can also print the QR code if you prefer carrying a paper copy.
Don’t submit the declaration too early. If you complete it outside the permitted period, you may need to register again closer to your journey.
You’ll need personal, passport and travel information to complete your declaration. Having your passport and flight or travel itinerary nearby can make the process quicker.³ Still need to apply for one? Read our guide to how to get a Philippine passport.
When registering for the first time, you may be asked for:
Once your profile has been created, you won’t normally need to enter all this information again. Check it before every trip and update anything that has changed.
You may also want to compare travel insurance in the Philippines before your trip.
For each arrival or departure, you may need to provide:
Make sure these details match your actual booking. A small mistake in your flight number, travel date or direction could affect your declaration.
The eTravel process also collects health information.
Depending on the questions shown, you may be asked about:
Answer every question accurately based on your circumstances. The information requested may change, so follow the form presented when you register.
You can complete your eTravel declaration through the official website or the eGovPH app.
Enter your information exactly as it appears on your passport and travel booking. Check your flight direction carefully—particularly if you’re submitting declarations for both your departure and return.
Yes, provided the declaration hasn’t already been screened by the Bureau of Quarantine or Bureau of Immigration.
Open the Edit Registration section of the eTravel website or app to make changes.
Update the declaration as soon as you notice an error. Don’t create a second submission without first checking whether the original can be edited.
If you’re a Filipino planning a trip - or a foreigner currently in the Philippines you’re probably wondering: do I need eTravel going out of the Philippines?
Here, your nationality matters. Only Filipinos usually need to complete their eTravel record when leaving the country, including when leaving as a passenger or crew member.
Foreign tourists in the Philippines don’t need to complete the eTravel step on departure.
Before your flight, check whether you also need to pay travel tax and whether it’s already included in your ticket.
Yes. You can get the eTravel app on both the Apple App Store and Google Play.
There’s a QR code you can scan on the eTravel website, or you can search your own store’s app feature to find the correct app. Make sure the app you download is the official one, to avoid fraud or scams.
After you submit the eTravel registration, which has your trip details in it, you’re issued with a QR code.
Your QR code will be either green - meaning everything is OK - or red, which means you need further checks at the border. A red QR may be because of incomplete or inaccurate information, or may be because you’ve been unwell, or in contact with someone who has been unwell, and require health monitoring before you enter or leave the country.
If you get a red QR response, you may need to get in touch with the eTravel team to get advice on what to do next.
It’s important that you keep hold of the QR you’re issued. You’ll see the option to download it in the app or on the desktop site when you’re issued it. You can also screenshot or print it. You’ll then have to show the QR to the staff at the air or sea port when you travel.
If you lose your QR, you can retrieve it later by going to the Edit Registration tab in the eTravel website or app. Here you can view your QR and download or screenshot it.
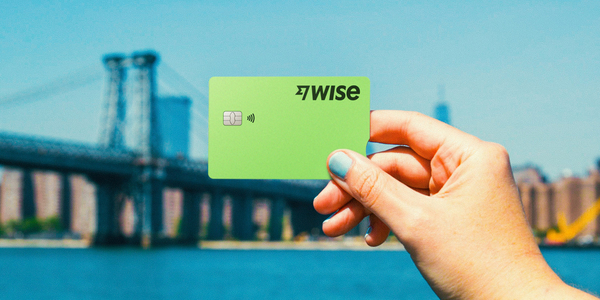
The Wise card lets you spend in 40+ currencies at the mid-market rate including USD, SGD, GBP, and JPY so you know you'll be getting a great deal in over 150+ countries. Simply create a free Wise account, order a card and top-up PHP to get started.
A physical Wise card can be ordered for a low fee of 369.60 PHP. Having a physical Wise card allows you to make chip and pin payments, as well as 2 free ATM withdrawals to the value of 12,000 PHP each month, before low fees start.
In supported countries, Wise also lets you pay with QR codes, giving you another easy way to pay when cards or cash aren't your first choice. That means you can use Wise for card payments, cash withdrawals, and QR payments, all from the same account.
While abroad, you can choose to spend directly in PHP and let auto-conversion do the trick, or convert to your desired currency with your Wise account. Either way, you’ll get the exchange rate you see on Google, with low, transparent fees from 0.57%.
Want to check the features and costs first? Read our Wise Card Philippines review.
Sources:
*Please see terms of use and product availability for your region or visit Wise fees and pricing for the most up to date pricing and fee information.
This publication is provided for general information purposes and does not constitute legal, tax or other professional advice from Wise Payments Limited or its subsidiaries and its affiliates, and it is not intended as a substitute for obtaining advice from a financial advisor or any other professional.
We make no representations, warranties or guarantees, whether expressed or implied, that the content in the publication is accurate, complete or up to date.

Read our Saily eSIM review for the Philippines. Compare prices, coverage, setup, compatible phones, pros and cons, and see if Saily is worth it for your trip.

Read our Airalo eSIM review for Filipinos, covering plans, prices, installation, compatible phones and comparisons with Saily and Holafly.

Planning a Taiwan trip from the Philippines? Follow this 7-day itinerary covering Taipei, Jiufen, Shifen, Taichung and Sun Moon Lake, plus entry tips.

Follow a practical 3-day Macau itinerary for Filipinos, covering Taipa, Cotai, the Historic Centre and Coloane, plus entry and travel tips.
A detailed review of the GCash Klook Card, covering travel perks, welcome rewards, fees, exchange rates, and how it compares to the GCash Visa card.

A complete global list of visa-free and visa-on-arrival countries for Filipinos, with entry rules and regional breakdowns.